Jepson Pottery Blog
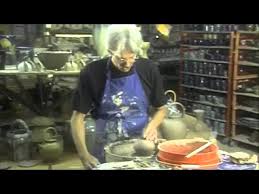
From the Wheel to a Shelf of Finished Pots
From the moment the pot is cut off the wheel until it rests on a shelf, each step is a tactile conversation with the clay. In this post I will walk you through that entire process, so you can finish a piece you’re proud to display.
Learn with Stephen — the full course, $49.99 lifetime
8 full-length video lessons, one-time price, 30-day money-back guarantee.
Get the Video Course →A young beginner, an adult, and an older adult can follow the same lesson: centering clay on the wheel. The course is $49.99 with coupon POTTERY4999.
A Memory from the Wheel
When I first taught a class at the University of Central Florida, a nervous adult student struggled to release a modest bowl from the wheel. After the wire cut, the piece came off cleanly, and she stared at the raw shape, eyes wide with surprise. A few weeks later, after drying, trimming, bisque firing, glazing, and the final glaze fire, she placed the finished bowl on her kitchen shelf. The simple pride she felt reminded me why I keep returning to the wheel after sixty years. The satisfaction of moving a piece from wet to finished is a steady, repeatable pleasure that anyone can experience.
The Technique in Plain Terms
Cutting the pot off the wheel – As the clay reaches the desired height, use a thin wire or a flexible cutting tool to slice through the base. You’ll hear a soft, crisp snap as the piece separates. The foot ring remains attached; it will become the stable base for later trimming.
Drying to leather‑hard – Allow the piece to sit until the surface feels firm yet the interior still yields slightly to pressure, much like a well‑conditioned leather shoe. This stage usually takes a few hours, depending on humidity and the thickness of the walls.
Trimming the foot – With a loop tool, gently press around the foot ring, shaving away excess clay and defining a clean edge. The loop glides smoothly, leaving a subtle, even lip that will sit flat on a shelf. Take care not to press too hard; you want a refined shape, not a cracked base.
Drying again – Return the trimmed piece to a dry environment until it is bone‑dry. At this point the clay is hard enough to handle without deformation, but still porous enough to absorb the bisque fire’s heat evenly.
Bisque firing – Load the bone‑dry pot into the kiln and fire the bisque. The bisque fire transforms the clay into a porous, durable ceramic, ready to receive glaze. You’ll notice the faint smell of heated stone as the kiln climbs.
Glazing – Once the bisque piece has cooled, dip or brush on glaze of your choice. The glaze should coat the surface evenly, and stay off the foot ring so the pot does not stick to the kiln shelf. The glaze will melt and fuse during the next fire, creating a glossy, waterproof finish.
Glaze firing – Return the glazed piece to the kiln. Fire it to the temperature that glaze calls for. The glaze vitrifies, giving the pot its final sheen and color depth. The kiln’s glow will reveal the transformation as the glaze settles into a smooth, glass‑like surface.
Setting on the shelf – After the glaze fire, allow the pot to cool slowly to avoid thermal shock. When the temperature reaches room level, gently place the finished piece on a clean shelf. The foot ring provides a stable, level base, and the pot now stands ready for use or display.
What You Can Try Today
1. Gather your tools – wire cutter, loop tool, a clean shelf, and a small kiln or access to one.
2. Throw a simple cylinder – Aim for a uniform wall thickness of about ¼ inch; this makes trimming easier.
3. Cut cleanly – Pass the wire under the pot, along the bat, and pull steadily. The foot stays on the pot.
4. Monitor drying – Let the piece dry until the surface is firm enough to trim.
5. Trim the foot – Hold the loop tool like a tiny compass, applying gentle pressure to carve a neat foot.
6. Bisque fire – Follow your kiln’s schedule; a slow ramp up reduces cracking.
7. Glaze – Choose a clear glaze for a natural look or a soft earth tone for subtle color. Brush on a thin, even coat.
8. Glaze fire – Use the same ramp schedule, adjusting the peak temperature to match the glaze’s specifications.
9. Cool and display – Once the kiln door opens, let the pot sit for at least an hour before moving it. Place it on a shelf, admire the foot ring, and feel the satisfaction of a completed cycle.
Closing Thoughts
Seeing a pot transition from a wet, spinning mass to a finished object resting calmly on a shelf is a rewarding loop that never loses its charm. If you’d like to explore each of these steps in greater depth, the full video course walks you through every stage, from cutting to final placement, with detailed demonstrations and tips honed over decades of teaching. The course is priced at $49.99, and you can apply the coupon code POTTERY4999 at checkout. Visit https://jepsonpotteryvideos.com/ for more information and purchase the course directly at https://payhip.com/order?link=89jNv&pricing_plan=63Wd1p69zw.
Enjoy the process, and may your shelves soon hold the fruits of your own hands.
Watch Stephen Demonstrate This Technique
Get lifetime access to 8 detailed pottery video lessons — wheel throwing, hand-building, glazing, and more.
Get the Video Course — $49.99 with code POTTERY4999 →Learn Pottery from a Master
60+ years of wheel-throwing, hand-building, glazing, and kiln work — now in detailed video lessons you can follow at your own pace.
8 full-length videos · Lifetime access · $149 $49.99 with code POTTERY4999
Photo by Jepson Pottery Videos • Published November 18, 2026
Learn with Stephen — the full course, $49.99 lifetime
8 full-length video lessons, one-time price, 30-day money-back guarantee.
Get the Video Course →